Silksong is the long-awaited sequel to the critically acclaimed Hollow Knight. Both are Metroidvanias where you play as a bug. And both are very difficult. Considering this game has a heck of a lot of bosses, I’ll be breaking them down by act. While the act 1 bosses are, technically, easier, they sometimes felt more difficult simply because the game is more linear at this point, meaning you often had minimal freedom over what tools and other upgrades you had at your disposal. Without further ado, a post that will be far easier to write than it was fighting the bosses mentioned below:
13: Moss Mother – Naturally, the first boss in the game is quite easy. She just flies around and makes things fall from the ceiling. Just pogo her when she swoops at you, and you’ll be fine.
12: Skull Tyrant – This optional boss can be found in the Marrow. It will charge at you and make rocks fall from the ceiling. Fortunately, it’s not that difficult because you can just hide under a ledge the whole time. The boss can still charge and hit you if you stand too close to the opening, but if you stand back, you can wait for it to charge at you, then run forward and slash it a few times after the charge has ended. It takes a while, but it’s the safest way to defeat this brute! It can also appear in Bone Bottom, and this time, you’ll have nowhere to hide, making it just a bit more difficult. I beat this thing by jumping over it whenever it charges and throwing out lots of tacks for it to run over.
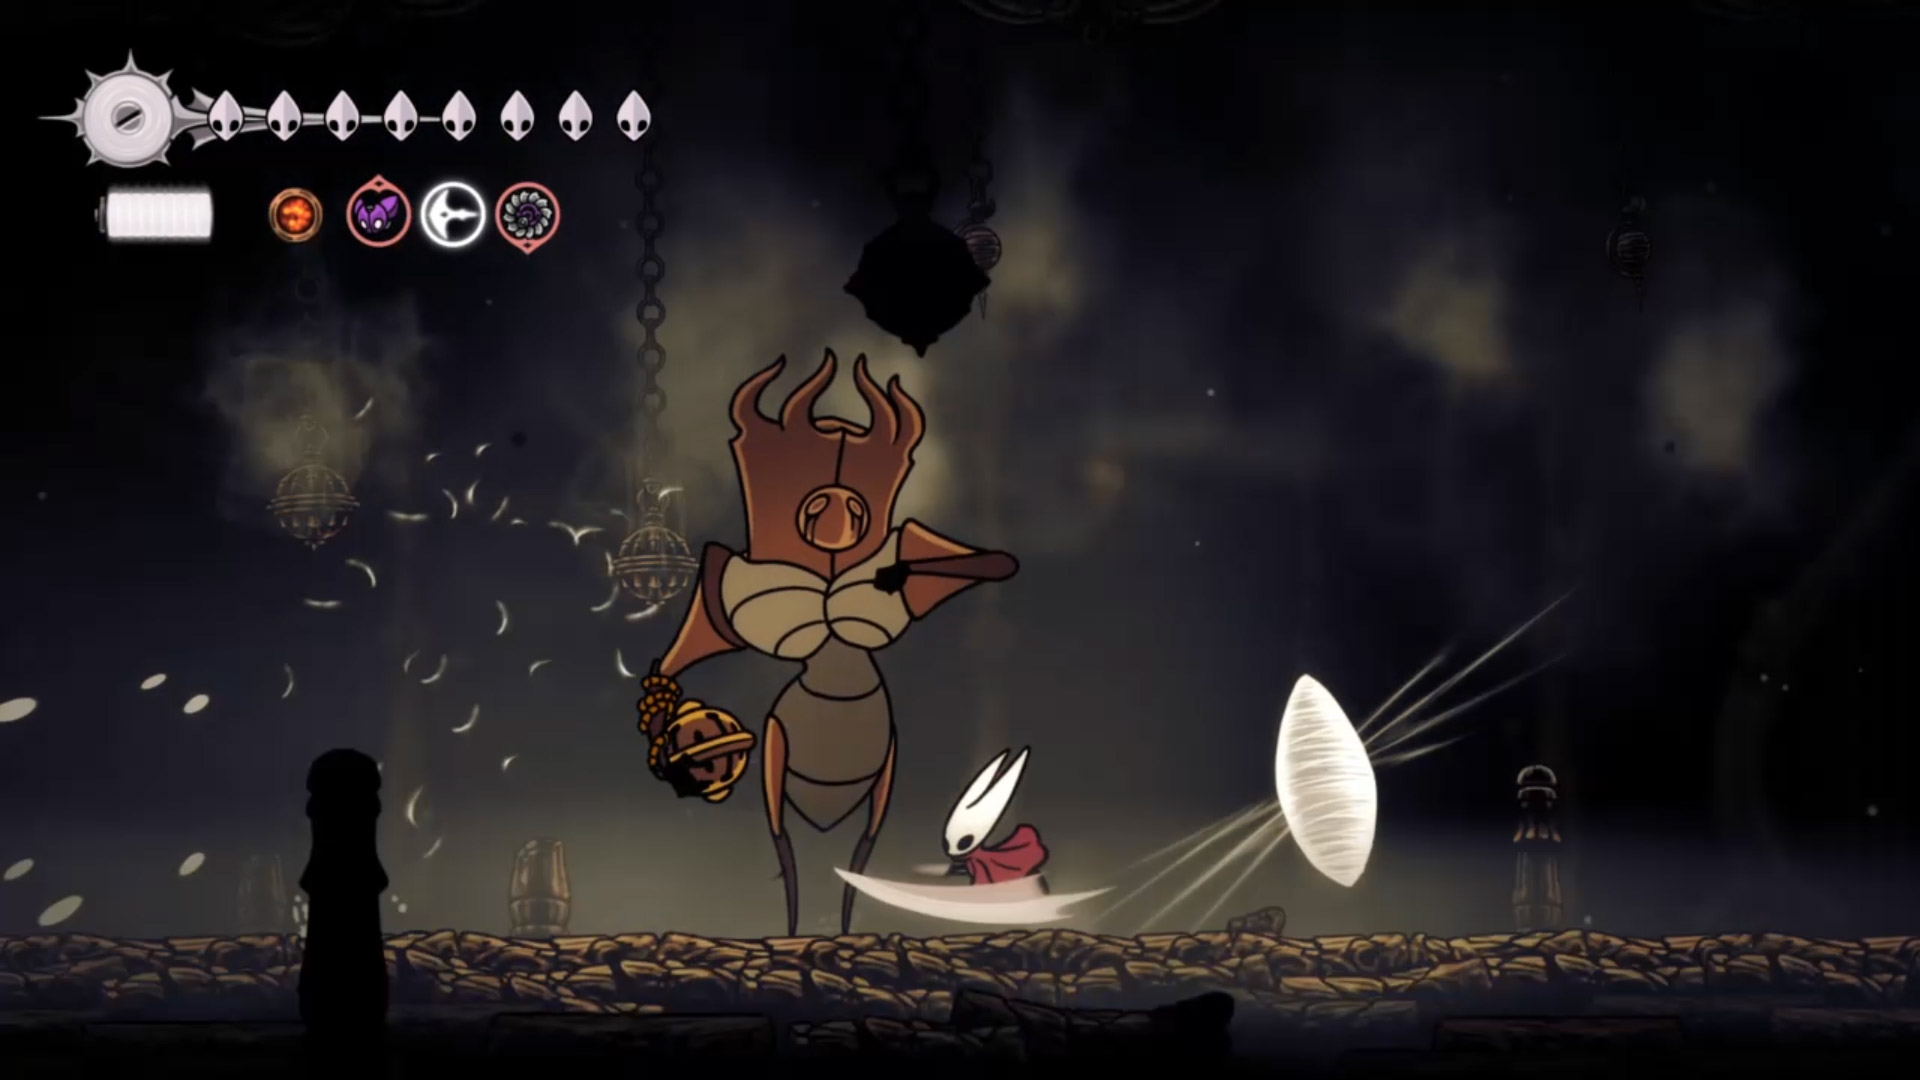
11: Bell Beast – The second boss of the game, this is the first enemy that was slightly challenging due to its large bulk. When it jumps at you, I’d recommend pogoing twice, or else you may land on the boss and get hurt. And then when it starts throwing lots of bells in the later half of the battle, instead of dodging them, I just stood on the far left side of the room where most of the bells don’t reach. Then I just jumped and pogoed whenever the boss popped up beneath me.
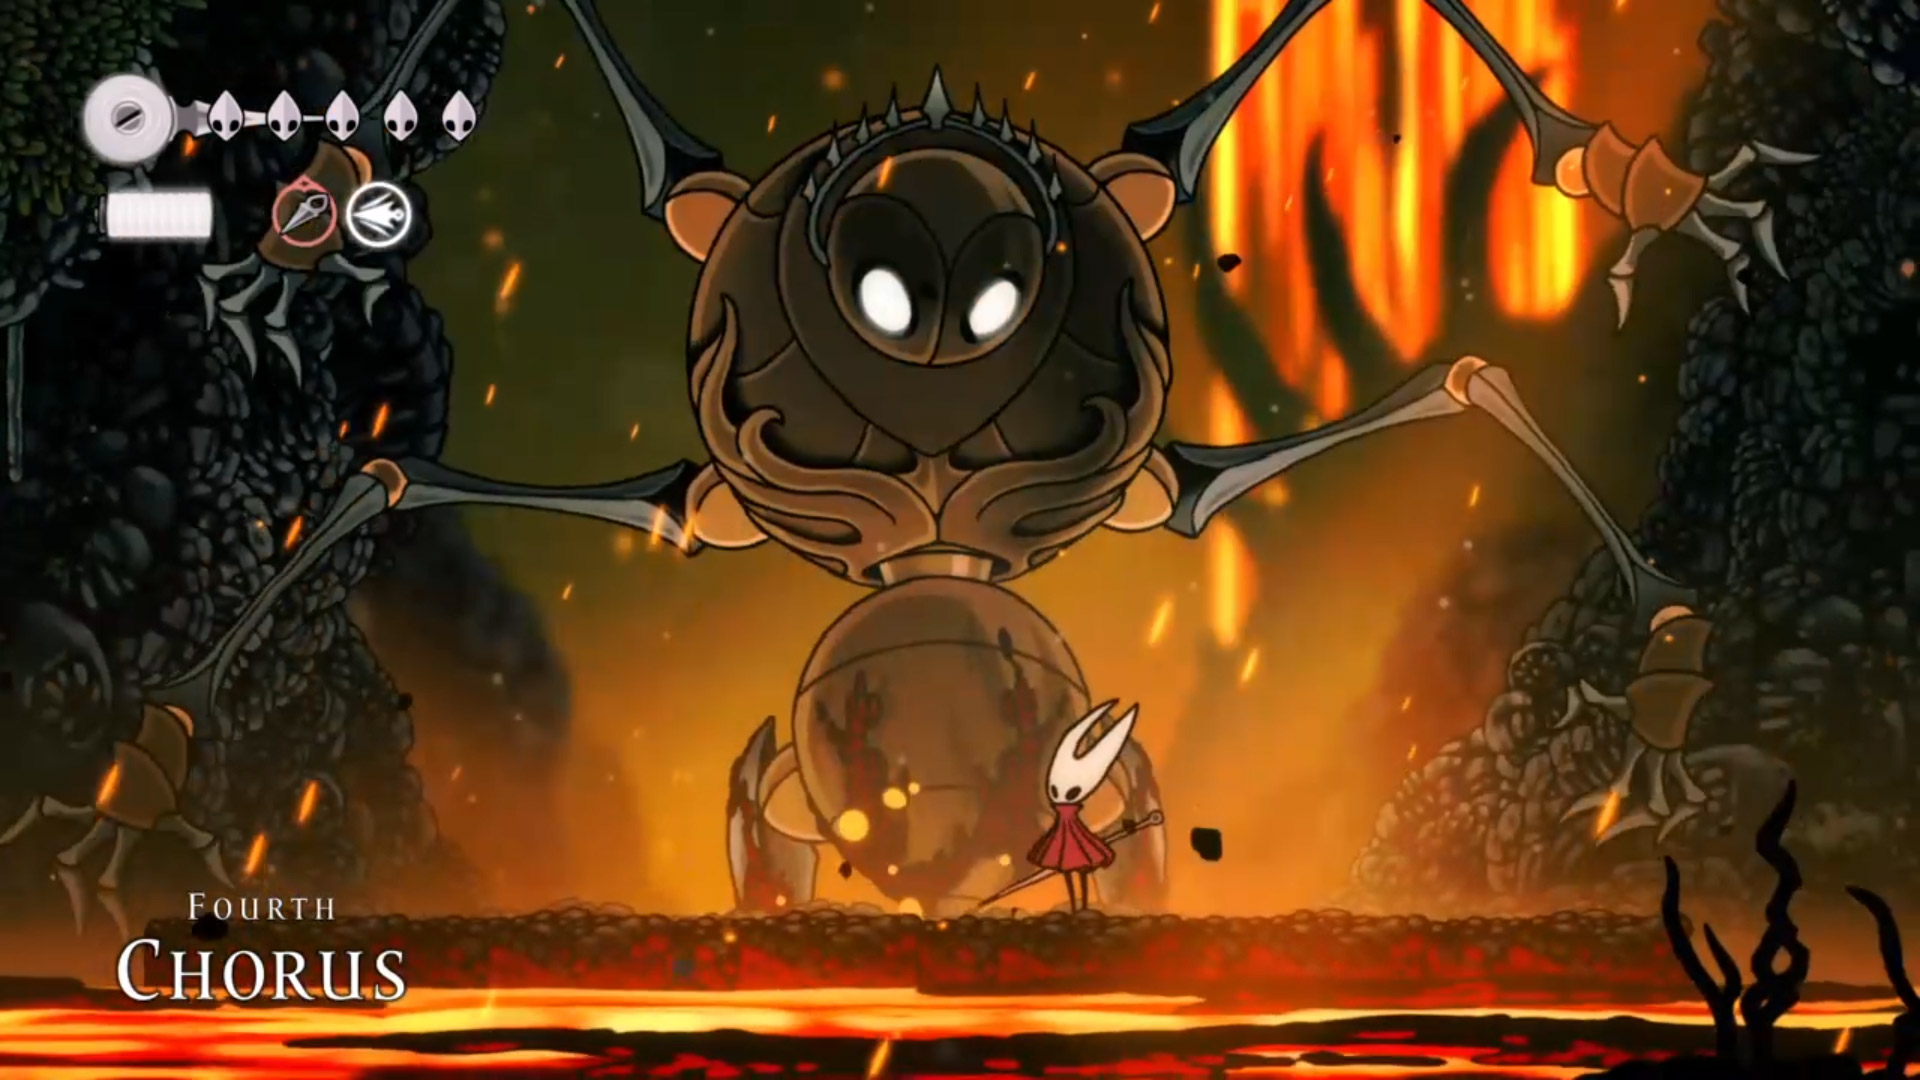
10: Fourth Chorus – This massive, four-armed monstrosity blocks the way out of Far Fields after you get the ability to drift. Which is very rude. But we’re not ranking enemies based on manners. This guy is intimidating, but he’s also a bit of a pushover. His bottom arms swipe horizontally, so you just need to jump over them. His upper hands hit the ground and temporarily break part of the platform you’re on (which is floating on lava, mind you). The whole time you’re keeping an eye on all those arms of his, you’ll be jumping up and attacking his head. Later on, he even starts making rocks fall from the ceiling, which is pretty easy to dodge. Lastly, air currents will appear, and you’ll be able to float up and break the rocks onto his head for some good, old-fashioned karma. See how you like it, dude! All in all, not an overly difficult boss.
9: Lace (Part 1) – Lace seems to be this game’s equivalent of Hornet from the first one. She’s fast, she’s nimble, and she even has an attack that covers a large area. For this, you’ll see a glowing white spot, so just don’t stand too close…even standing on the edge of the platform if you can’t escape in time will probably keep you out of harm’s way. Just like with Hornet in the original game, it’s better to stay calm and just react to her attacks, as blindly running around will only lead to trouble.
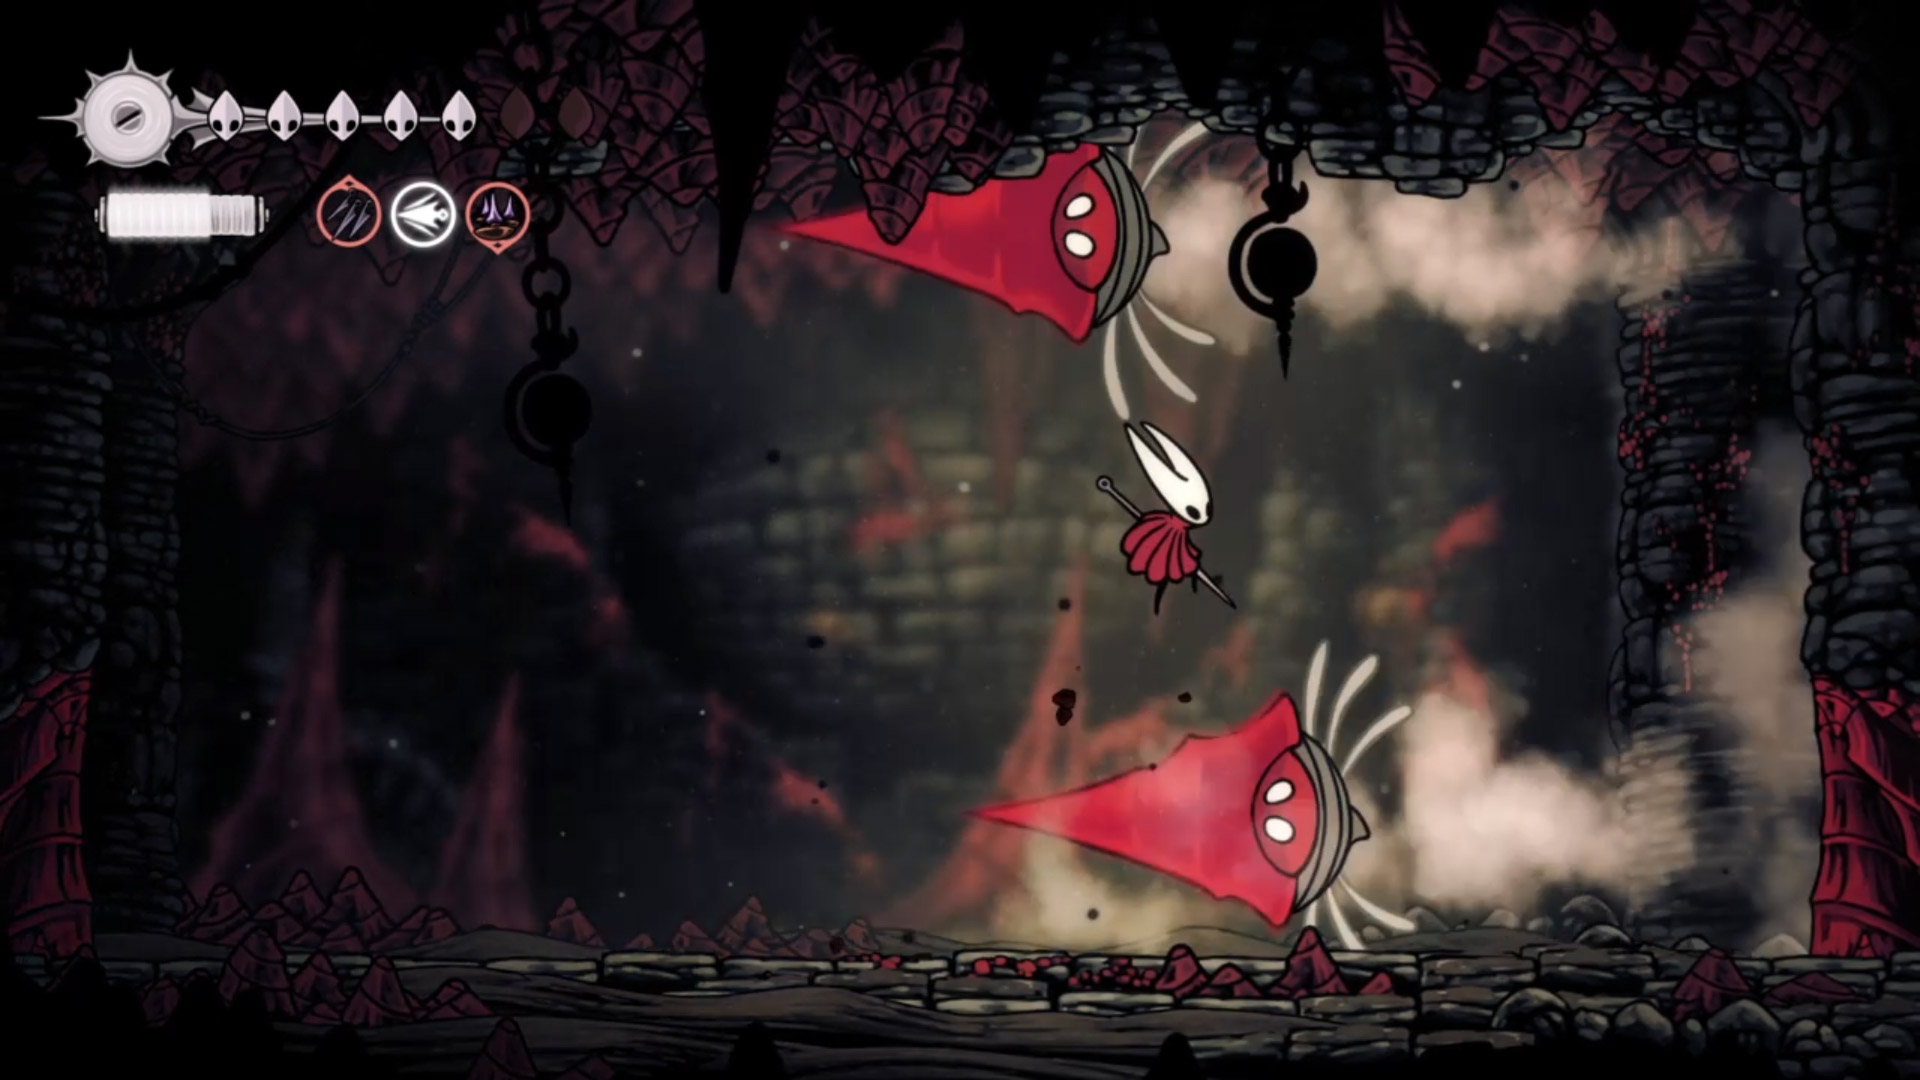
8: Great Conchflies – This pair of giant conchflies can be found in the Blasted Steps. They burrow into the ground, then pop out again to charge at you. They can also shoot projectiles that will bounce around the screen. Just like the small conchflies. They’re really not that bad, though. It’s not too hard to avoid their attacks, and they are big, easy targets. After defeating one, though, the other one retreated and screamed at me from the background. I’ve got a feeling that’s going to come back to bite me…
7: Sister Splinter – You can find this weirdo in Shellwood. She hangs from the ceiling and makes spiky vines appear that can interfere with how much room you have to move, but these can be quickly broken. The really troubling thing about her comes in the form of her punches, which deal two masks worth of damage each, and the minions she summons. For the punches, I learned it’s best to wait on attacking her until after the first punch so that I’m more prepared and know which side her next attack will be on. And for her minions, Silkspear and throwing weapons work great!
6: Widow – I actually really enjoyed this battle. It’s the perfect blend of fast-paced action, while still giving the player plenty of time to react to the boss’ attacks. The problem is, just when you think you defeated her, she pulls a trick right out of the Soul Master’s playbook and has one final phase that’s way harder. The best strategy I could come up with is to stay on the far right to avoid most of the projectiles, adjust your spot just in case one of the bells comes your way, then be ready to climb up the wall whenever she slashes at you. I won when I used this strategy, chucked all my throwing weapons at her that I had been saving for the whole battle, then just carefully maneuvered between the bells for quick slashes at her once I ran out of long-distance attacks.
5: Moss Mother Duo – In a secret section of the Moss Grotto called Weavenest Atla, you’ll be stuck fighting not one, but two, Moss Mothers. As you’d expect, this battle is much harder and chaotic than the fight against one. First of all, you have two of these big creatures swooping at you in a rather cramped room. To make matters worse, there are also way more rocks and enemies falling from the ceiling. Luckily, the smaller enemies are easy to beat, but there’s just way too much going in an already small room. Lots and lots of pogo attacks are the best way to beat this boss, allowing you to have an easier time avoiding the swooping attacks and staying off the ground.
4: Moorwing – The battle against Moorwing is a hectic affair and is surprisingly difficult for so early in the game. This thing can fly and swoop at you, while also sending out saw-like projectiles. You can get help from Garmond and Zaza, but they actually proved to be so distracting that I did even worse once their presence was added to the fray! But once I got used to the addition of my temporary companions, this battle is just a bit too fast-paced and chaotic for me. I did finally win, of course, but boy was it awful!
3: Phantom – The battle against Phantom is utterly miserable, partly because it’s just so long and tedious! The Phantom will spend most of her time throwing her weapon at you before dashing to it. And all you can really do is just keep pogoing her. Over and over again. Starting in phase 2, she will also start attacking with these blasts of steam or something, which take up a large area and are hard to avoid, so always be on the lookout for when she jumps up and disappears from sight. The final phase involved her creating a bunch of these blasts in quick succession, but as long as you keep running back and forth, you should be okay. After that, just keep focusing and treating this as you would phase 2, and you’ll get through it. Eventually.
2: Savage Beastfly – The first battle against this guy in the Chapel of the Beast isn’t so bad. But later, you’ll get a quest to hunt another one in the Far Fields, which is utterly awful! You fight this one in the same location as Fourth Chorus, on some land floating on lava. The horizontal charging attacks aren’t too bad, but it can also charge downward and make parts of the ground disappear temporarily. Sometimes, it will even destroy every piece of the floor, forcing you to hover and hope that new land will sprout up before you hit the scalding magma below. All of this, I can manage, though. The worst part, frankly, is the minions. This particular Beastfly enjoys summoning these flying bugs that shoot balls of fire at you, and whenever those show up, it’s all over. Thread storm helped a lot with getting rid of them, though. After a lot of concentration, I finally prevailed, but this is one battle I never want to attempt again.
1: Last Judge – I had originally bypassed this battle by fighting the Phantom instead (the runback is awful, and I just couldn’t take it!), and even though I returned later, much stronger than I normally would have been, I still struggled. This boss is very tall and, without the double jump, you’re going to be hard pressed to get past them. They often jump, allowing you to run beneath, but sometimes, I would get cornered, with no way of escape. The boss will swing or throw this large ball on the end of a chain, and it can have some pretty long range to it. After some damage, they will then add fire to the mix, making dodging even much more difficult. I especially struggled with the circular waves of fire when they swung their weapon in a circle, but I did find the fire easier to avoid if I gave myself room and didn’t stand too close to the walls. I also had to learn how to avoid those fire pillars when they dash, but I would often pogo their head at this point and avoid the pillars altogether. I had to beat this boss twice because, when they die, they explode in a large burst of flame, which caught me off guard and killed me after my first victory…